Guidewire InsuranceSuite Workspace Tips – ConEmu
Within any Guidewire environment that runs more than one xCenter, there are a few ways to achieve this. For many this includes running multiple Studios. There are better, more streamlined ways to work which will save time while starting, debugging, and running your apps.
Problem
Running multiple xCenters requires either manually starting Studio and then clicking the run/debug icon to start the server or starting up a command window and running gwb runServer. In either case, manual steps are needed for each xCenter.
Once things are running, keeping all apps organized can become tedious as there are many windows to deal with. When debugging is needed if you forgot to start the server in debug, you have to restart and wait for that time.
If you have a startup issue, it can become difficult to debug since the code is within the actual startup of the xCenter.
If you are a portal developer, even more windows need to be started to handle UAA, watch windows, build windows and the likes.
Solution
Enter ConEmu. ConEmu is a free multi-tabbed console which can be used to organize your workspace and windows needed for InsuranceSuite and portal. Unlike other tabbed consoles, ConEmu is not a simple command window emulator, rather a highly customizable console terminal which just happens to support command windows. With this we can not only contain everything in one windowed app, but also automate the steps needed to run the Suite and then some.
How To
The first thing you will want to do is download ConEmu and install it. It can be found here.
Once installed there are some automation scripts that you can put in place to aid in starting your workspace. This will not only automate the workspace but also aid in the organization by labeling each console with its intent. As part of the automation, it also hooks up special key words within each console to easily start and stop the service.
Download the scripts here and place them into a directory under your Guidewire directory (e.g. Scripts)
Once you have the scripts installed, open each file and modify the paths for everything with a <> directory token (e.g. )
Note: It is very important on the StartDevEnv.bat file for the <Scripts Location> that this be a full path with no “” surrounding the path.
For example if your directory name is “D:Guidewire with a space in the nameScripts” then simply replace <Scripts Location> with D:Guidewire with a space in the nameScripts like below
if %running% EQU 0 start “” “C:Program FilesConEmuConEmu64.exe” -run @D:Guidewire with a space in the nameScripts%ConEmu%
It will not work otherwise.
It should be stated that there is a complete workspace tooling app which builds these files for you but that is in a different blog. So for now, you must hand configure them.
What to Expect
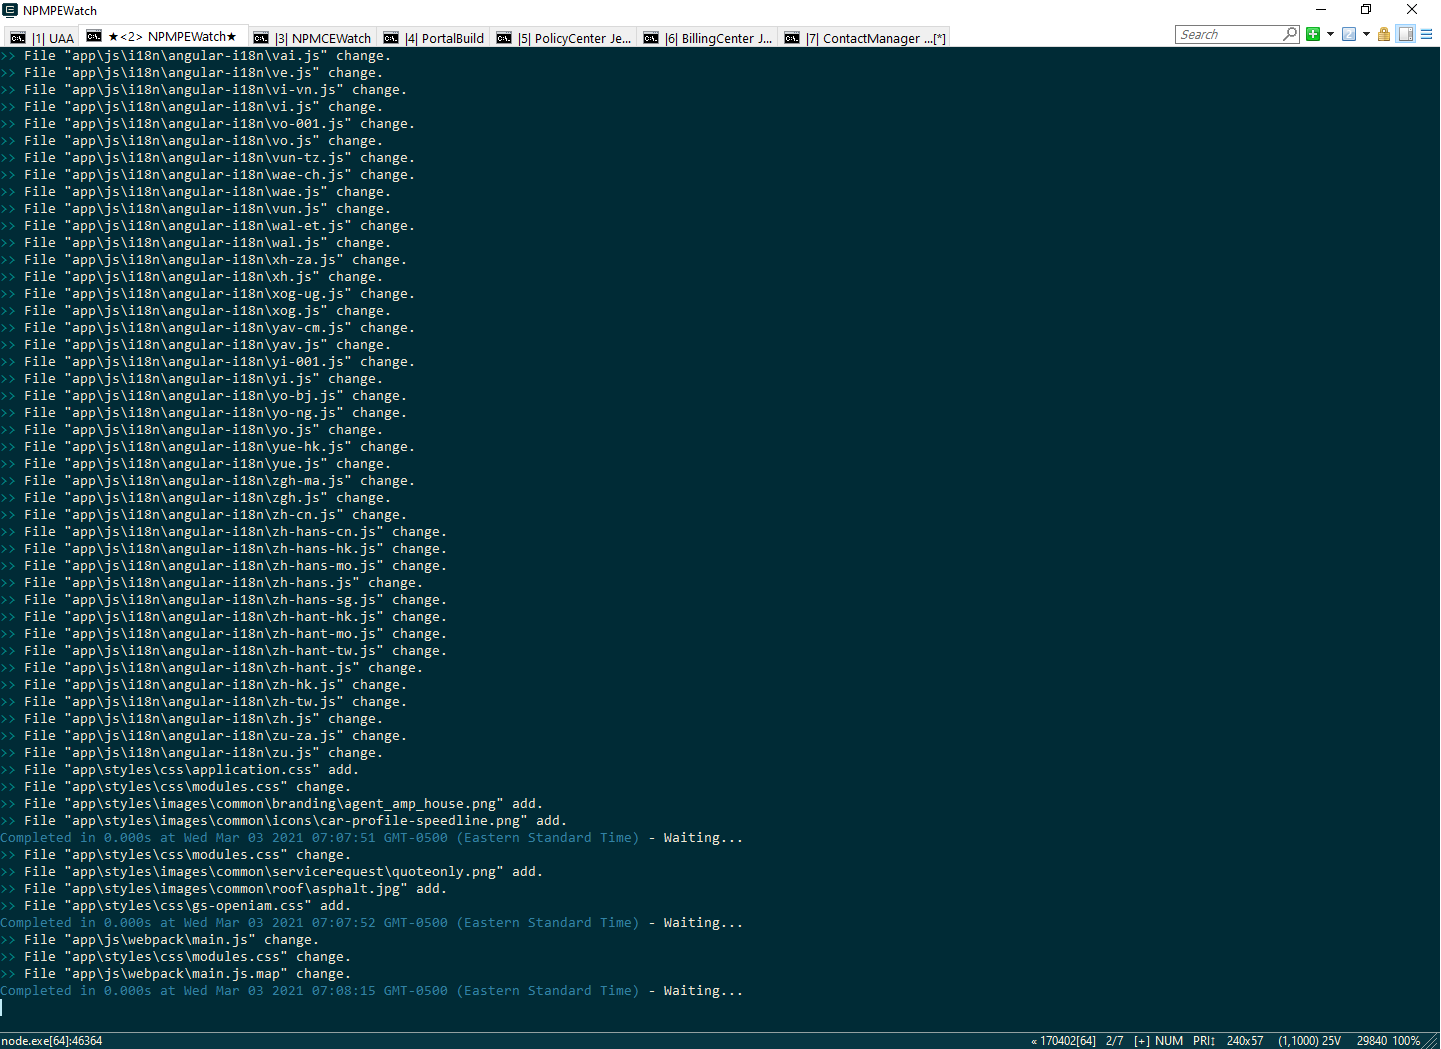
A fully running environment might look similar to this picture. (Note: This is a portal workspace)

You can see that we have each xCenter, (in this instance there is no ClaimCenter) along with other consoles to aid in portal development. Each tab is labeled and can easily show which tab has focus. (e.g. the one with the star)
Commands
In addition to the organization, each console offers a run command which will invoke the needed utility to perform the same steps over. For example, to re-run PolicyCenter, you simply type run and press enter. The command needed to run is buried within the run command.
You can also press Ctrl-Alt-C to clear the console.
xCenter running
If that wasn’t enough, when it comes to xCenters, the run command offers multiple ways to run.
Server starts
If you chose (C)ompile it will simply start the server as if it were in Studio (e.g. compiling then running)
ru(N) will simply re-run without compiling (for speedier startup)
(S)uspend will start the server but wait for the debugger to be attached before continuing. This allows for breakpoints to be placed within the actual startup code.
Prod mode
(D)ev mode will start the server in, well, dev mode
(P)rod mode will start the server in prod mode thereby allowing you to check various database and entity changes for validity
Database
If you are hooked up to SQL you can use (S)ql or for quick running, choose (H)2. For complete instructions on installing SQL, please refer to this blog.
After this, you are off and running.
Note, each of the previous prompts are timed and will default if not met within 5 second.
Conclusion
There are many more areas we could cover within this framework but this just give you a glimpse into how to make your workspace work for you rather than you working for it.
Troy Stauffer
Senior Software Architect
Watch or read our other posts at Kimputing Blogs. You’ll find everything from Automated testing to CenterTest, Guidewire knowledge to general interest. We’re trying to help share our knowledge from decades of experience.


